 |
| What you will need- Rotary cutter with a good blade, cutting mat, scissors, lots of pins and a piece of glass. You don't need a cutting mat this large if you don't already have one. You can get smaller ones or even use cereal boxes. |
 |
| You can use scissors and a measuring tool to cut the squares, but I had a piece of glass cut out to measure 4 1/2" by 4 1/2" at Lowe's for $3 and it made this step a whole lot easier. It's a sure way to get all the squares perfect. |
 |
| Start cutting out the squares from your clothes. |
 |
| Pick the spot that you want to be your square and place the glass over it. That is another reason the glass is nice for this step, you can see exactly what you will end up with. |
 |
| Cut around the piece of glass. |
 |
| If you are choosing a piece that has buttons, snaps, zipper, or a collar- make sure to put a back on it so you can actually open them on your quilt and it won't open up to batting. There's a picture of what I mean three pictures down. |
 |
| Pin the front of the square to the back. Not all squares will need pins. Some will just be one piece of fabric, but I wanted to show this example |
 |
| If you cut a good square and pin when necessary, the sewing part will be much easier (trust me!) |
 |
| Here is where you can see why you need a back to squares with an opening. This square had a zipper and you can actually use it when the quilt is finished. You wouldn't want that to open up to the inside of the quilt. |
 |
| Here is another example of a square. This was just a plain Onesie and since the material is a little thinner and I don't like to mess with interfacing, I just double it up with another piece. I pinned the printed square on top of the solid one to make it a little easier to work with while I sew. You should be able to get as many squares as you want from your clothes. I usually get three to use on the quilt from each item. |
 |
| If you have details that will be close to the seam (such as bows), pin them in so they don't get hidden in your stitching. Allow for 1/4" seam. |
 |
| After you cut what seems like an endless supply of squares, you are now ready to arrange them.I don't count the squares as I cut them, I just cut the ones that I KNOW I want and determine the size of the quilt accordingly. I swear, when I have a lot of these to make everything in my head becomes a square! |
 |
| Start arranging them. Pick a spot safe from meddling kiddos and curious pets. |
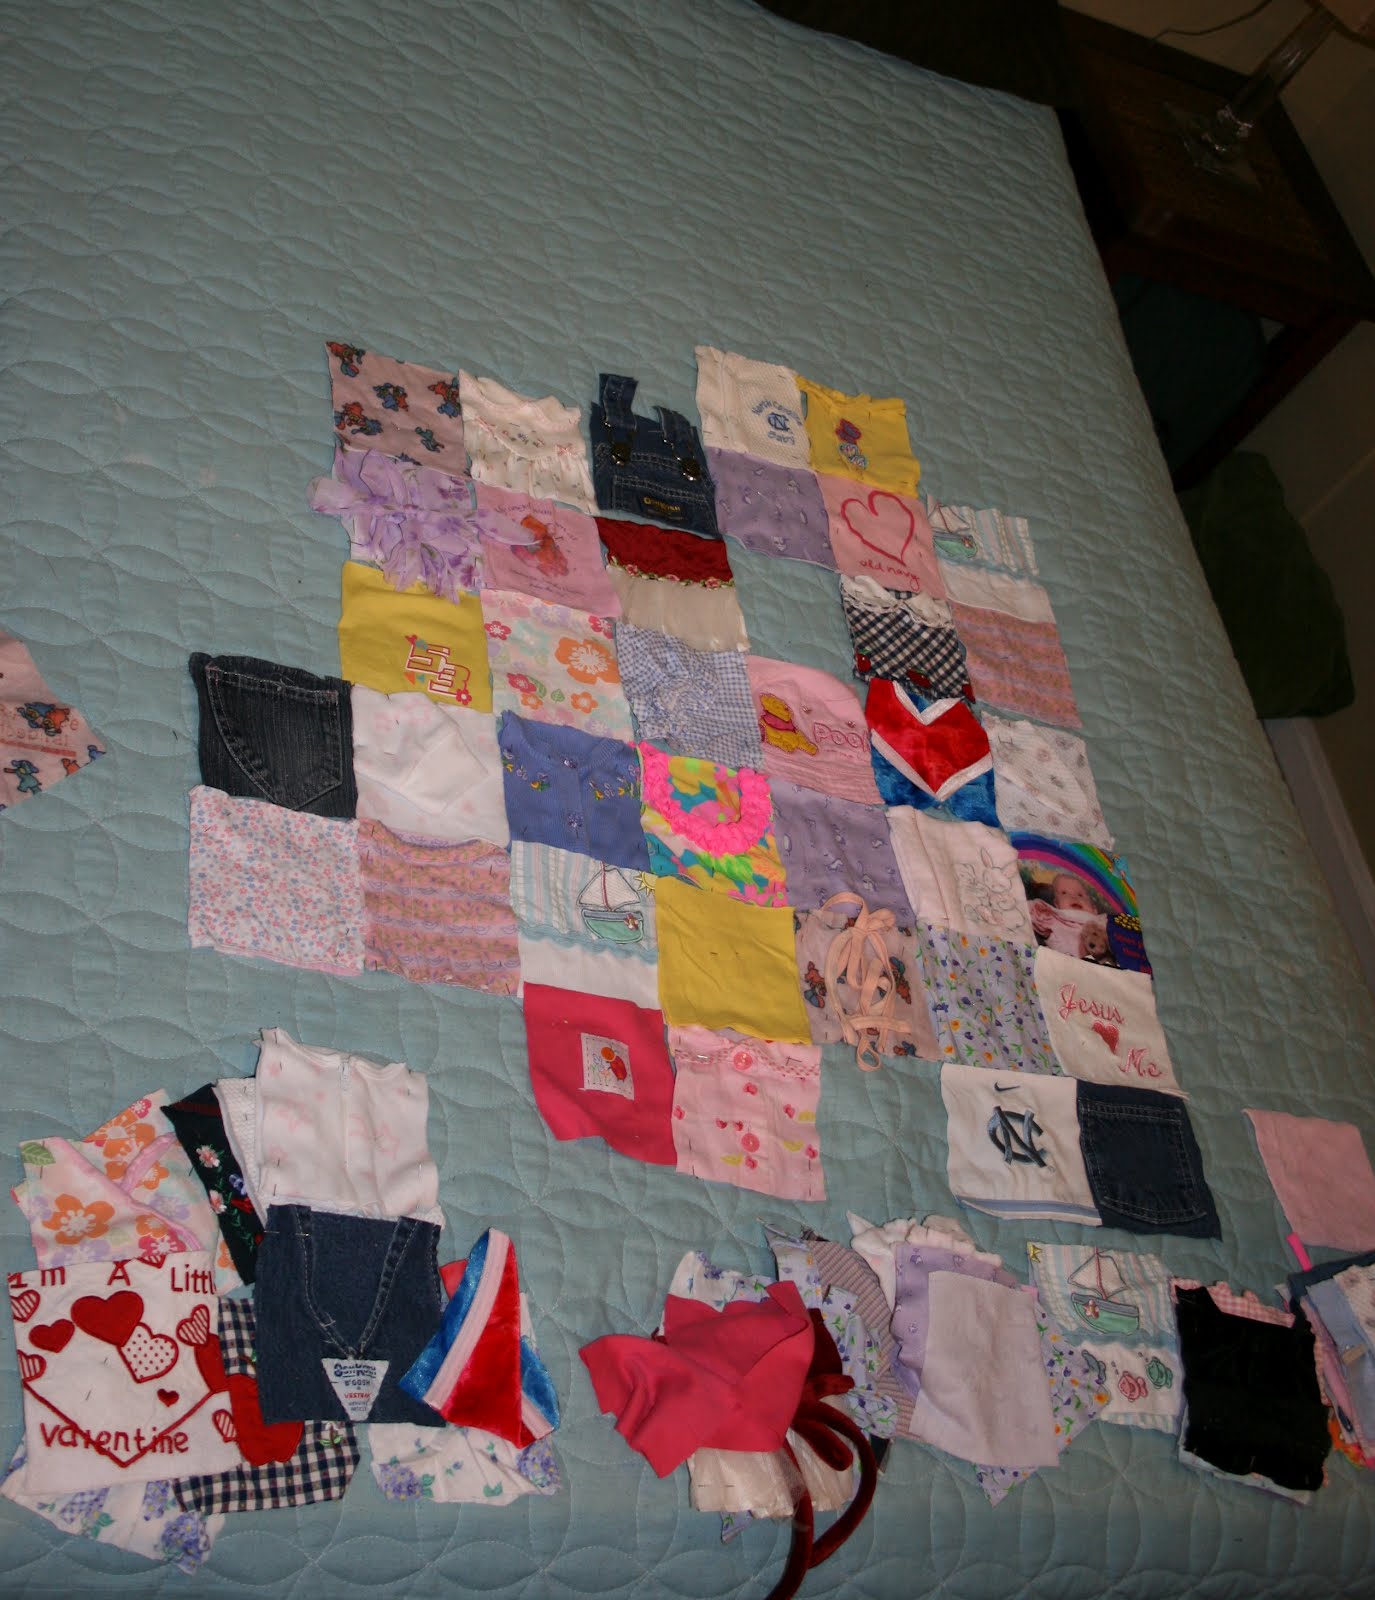 |
| It's a "put this here, move it there" kind of process. |
 |
| Almost got it..... I usually have 2-3 squares per outfit to stretch the quilt out to a good size and even out the colors. I highly recommend saving all your scraps in case you come up short, mess up a square, or just want to change one. The size of the quilt completely depends on how many squares you have. You can arrange them any way you want. If you don't have many clothes and want to make your quilt bigger, just buy some fabric. The idea is still there and it will still be a cherished keepsake. |
 |
| There! Got it! At this point, I take a picture of the quilt laid out for reference. Sometimes I get the order mixed up and it's nice to be able to look at the photo as a guide. Then just stack them in order to be ready for the next step-sewing! |
 |
| Sewing them together is a fairly simple process. This is where all your faithful pinning and careful cutting comes into play. A memory quilt was actually my very first sewing project so don't think you have to have experience to make one of these! First lay out your first two squares. |
 |
| Then place the right sides together |
 |
| Sew the seam with a 1/4" allowance. Never mind the toy phone. It's not crucial to this step. |
 |
| Fold out and you have your first seam! Yay! |
 |
| Repeat this step until you have your first row sewn together. |
 |
| Keep sewing in the same method until you have all your rows done. I try to stack them in order, but it never fails that they get switched around which is why the photo you took will come in handy. |
 |
| Now you are ready to lay out your rows. It's very similar to sewing those first two squares, just on a bigger scale. |
 |
| Fold the top to the bottom and get ready to pin, pin, pin. |
 |
| Start pinning the bottom of the top row to the top of the next row down. Make sure you have the pins on the correct side to be sewn so you don't sew a row upside-down. |
 |
| Match your seams and make sure to pin! I usually put a pin on each square where the seams meet (so where my thumb is in the picture, there is another pin). If after you sew the rows together, the squares aren't perfectly matched, don't worry. You can correct that when you tie the quilt during one of the final steps (never fear-there's a picture to explain this-lol) |
 |
| When I sew, I always have company. I highly recommend having your crew near. Makes it all the more fun! |
 |
| Now you have two rows sewn together. Keep repeating the "fold, pin, sew" process until you have everything sewn together. |
 |
| Tah-Dah!!! |
 |
| If you chose to keep sleeves, footies, or other hanging items to have on your quilt, now is a good time to sew them down so they don't flap around when your quilt is finished. I sew a small line on the inside of the sleeve so I can put my fingers into the opening, but the sleeve isn't sewn shut. I LOVE being able to feel how small the openings were...... |
 |
| You can't really see where I sewed, but it was on the zig-zag. I hope that makes sense? |
 |
| Now it's time to put it all together with the back and the batting. First lay out your batting. |
 |
| Place the backing on top of the batting. If your backing has a side, make sure you put the quilt and the backing right sides together. I had this one monogrammed with the baby's name (you can't see it) so its facing up. |
 |
| Put your quilt on top of the backing. You will be sewing this all together inside out (with an opening) and you will turn it right side-out when finished. |
 |
| Pin all the way around your quilt. Don't be stingy with the pins! It will help you a ton. Try not to stretch the quilt as you pin, it changes the shape. |
 |
| Pick where your opening will be. Try to pick good strong material for this spot because when you turn it right-side out, it will get a little stretched and worked. For this one I chose where fleece and a good heavy cotton are sewn. |
 |
| (Sorry for the terrible picture!) Start sewing around your quilt. Start where you want your opening to be and make sure to stop about 5 1/2" before you get all the way around. |
 |
| Can you see where the opening is? I used black thread. |
 |
| Before you turn it right-side out- double, triple, and quadruple check for any pins. I grab all around the edges and seams just to be sure I've got them all! I would rather be the one getting stuck than the person using the quilt! |
 |
| Trim the batting and backing. |
 |
| Now to turn it right side out! Yay! Just keep pulling and tugging as carefully as you can and with a little work............ |
 |
| Voila!!! |
 |
| Now it's time to tie the quilt. Pick a good, comfortable spot. I like the dining table. |
 |
| You will need a needle, scissors, pliers (sometimes the material is so thick that it's hard to pull the needle through so the pliers help!) and embroidery floss. I use all six threads of embroidery floss. You can use one color for the whole thing or alternate several. Whatever you choose. The coffee is optional. |
 |
| Pass the floss through the front at the corner of the square |
 |
| Bring it up through the back and cut it off |
 |
I tie three knots and tie at EVERY corner. You may not have to tie at every corner, you probably could get away with every two or three, but I think it looks better at every one. Then trim the tie to about 1/4"-I forgot to get a picture of that. |
 |
| If your squares don't match up perfectly, this is where you can correct that. See how these don't meet up? Just put your floss at the points you want to bring together. |
 |
| Then tie nice and tight and there you go! All the differences in material for these quilts make it hard to make them perfect. |
 |
| Last step! It's now time to stitch your opening closed. You will be using a blind stitch. If you don't know what that is, here's a good video tutorial |
 |
| Make sure you pinned it good for a nice even line and start sewing it closed. |
 | ||
That's it! You are done!! I would love to see what YOU'VE made! Send me
pictures and if you have any questions or need more pictures or a step
please contact me at AndreaLarsen22@Gmail.com.
|


